
 Paper Is Smudged / Printed Surface Is Scratched
 Paper Is Smudged
 |
 |
|
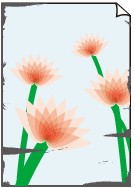
Smudged Edges |
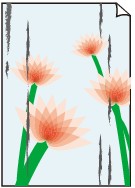
Smudged Surface |

Printed Surface Is Scratched

-
Check1 Check paper and print quality settings.
-
Check2 Check paper type.
Make sure you are using the right paper for what you are printing.
-
Check3 Correct curl before loading paper.
When using Photo Paper Plus Semi-gloss, even if the sheet is curled, load one sheet at a time as it is. Rolling this paper in the opposite direction to flatten it may crack the paper surface and reduce the print quality.
We recommend putting unused paper back into the package and storing it flat.
-
Plain Paper
Turn the paper over and reload it to print on the other side.
Leaving the paper loaded on the rear tray for a long time may cause the paper to curl. In this case, load the paper with the other side facing up. It may resolve the problem.
-
Other Paper such as envelope
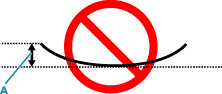
If the paper corners curl more than 0.1 in. / 3 mm (A) in height, the paper may smudge or may not feed properly. Follow the instructions below to correct the paper curl.
-
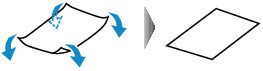
Roll up paper in opposite direction to paper curl as shown below.
-
Check that paper is now flat.
We recommend printing curl-corrected paper one sheet at a time.
-
 Note
Note-
Depending on paper type, the paper may smudge or may not feed properly even if it is not curled inward. Follow the instructions below to curl the paper outward up to 0.1 in. / 3 mm (C) in height before printing. This may improve the print result.
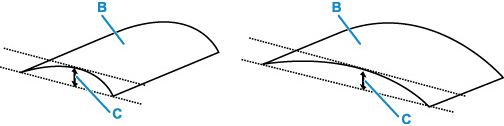
(B) Print side
We recommend feeding paper that has been curled outward one sheet at a time.
-
-
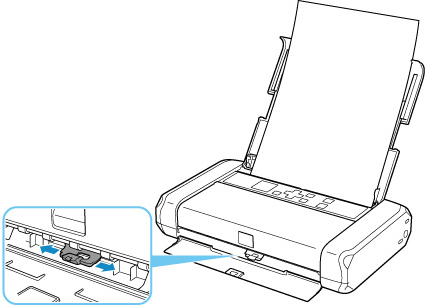
Check4 Is the paper thickness lever set properly?
Adjust the position of the paper thickness lever properly according to the type of paper you are printing on.
For details on how to load paper or the position of the paper thickness lever:
Depending on the printing content, the printing surface may become scratched or the corners or edges of the paper may become smudged even for the types of paper to set the lever to the right. In this case, set the paper thickness lever to the left.
Reset the paper thickness lever to the right when you finish printing. If the paper thickness lever is not set back to the right, the inside of the printer is more likely to get dirty due to the wider clearance between the print head and the loaded paper. It may also reduce print quality.
-
Check5 If brightness is set low, increase brightness setting and try printing again.
If you are printing with a low brightness setting on plain paper, the paper may absorb too much ink and become wavy, causing paper abrasion.
-
Printing from your computer (Windows)
Check the brightness setting in the printer driver.
-
-
Check6 Is printing performed beyond the recommended printing area?
If you are printing beyond the recommended printing area of your printing paper, the lower edge of the paper may become stained with ink.
Resize your original document in your application software.
-
Check7 Is paper feed roller dirty?
Clean paper feed roller.
Note-
Cleaning the paper feed roller abrades it, so do this only when necessary.
-
-
Check8 Is inside of printer dirty?
Ink may stain the inside of the printer, smudging the printout.
Perform bottom plate cleaning to clean inside of printer.
Note-
To prevent staining inside the printer, be sure to set the correct paper size.
-
-
Check9 Set longer ink drying time.
This allows the printed surface to dry, preventing smudges and scratches.
-
For Windows:
-
Make sure the printer is turned on.
-
Open Canon IJ Printer Assistant Tool.
-
Select Custom Settings.
-
Drag Ink Drying Wait Time slide bar to set the wait time and select OK.
-
Check message and select OK.
-
-
For macOS:
Set the waiting time using Remote UI.
-
